Manuals, FAQ & Video
We Are Here To Help
Manuals, FAQ & Video
Manual
Video
FAQ
- On the default screen (current day & time) the word “Auto” should be visible. If this word has a bar / line above it then the programmes have been temporarily disabled – please click here to view instructions on how to activate your programmes. Scroll to “How do I stop my programmed schedule from running without erasing all the programmes manually?”
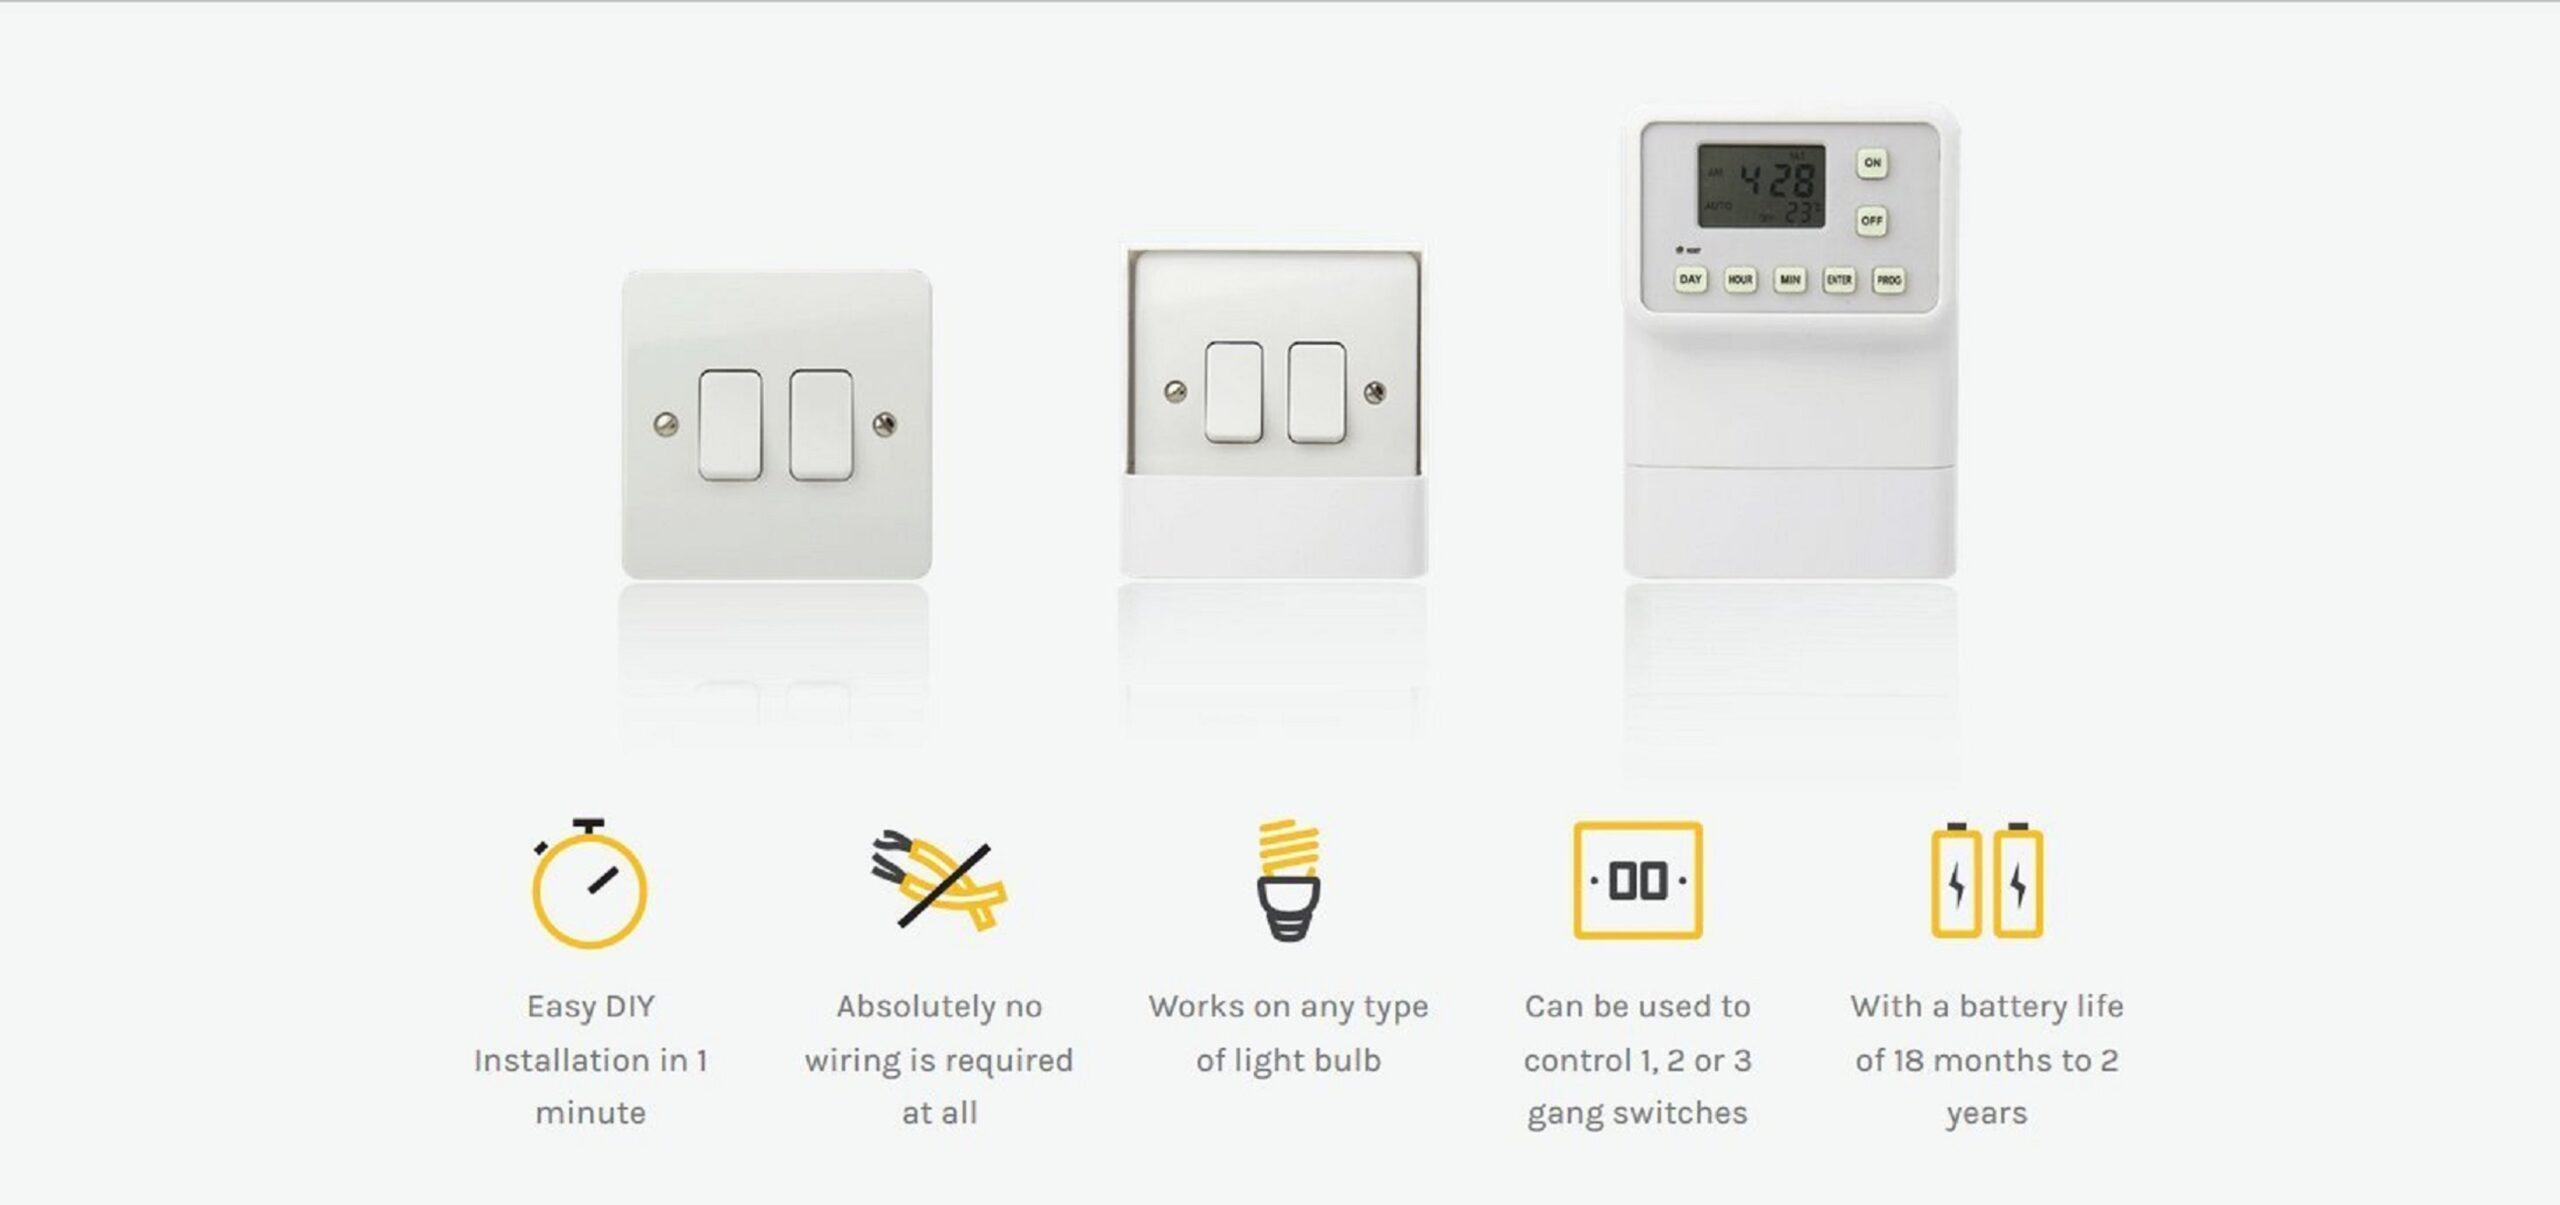
- Check that the wheels are positioned in the correct slots on the light switch timer back plate – use the “1, 2 & 3 number key found at the top of the back plate to position the wheels based off the type of position of the switch you wish to control i.e. 1,2 or 3 gang switch
- Programming may not have been input correctly – please view the video below (programming) to view a step by step guide.
- Use the provided “n shaped” inserts to reduce the gap between the light switch timer control wheels and the light switch. Inserts should be placed inside the frame of the cradle behind the light switch
The light switch has been installed upside down. Please follow the instructions below:
- Turn off the electric
- Unscrew the light switch from the wall completely
- Rotate the light switch 180° and secure back in to position
- Turn on the electrics
- Test using the manual “On / Off” buttons on the light switch timer
The light switch timer control wheels are too close to the light switch and is pushing up against it during cycles – please do the following:
- Remove any “n shaped” inserts that are in position
- The curve on the light switch may be too thick – consider changing the light switch
The light switch timer is designed to have an 18 month – 2 year battery life cycle depending on the frequency of programmes and stiffness of the switch. Rechargeable batteries can cause reduced battery life and would be the main reason why this problem is being experienced.
The light switch timer comes with 3 wheels.
2 wheels are usually placed in the back plate position.
1 wheel is usually placed at the top of the light switch timer in the “cubbyholes”. All spare wheels are designed to be placed here when not in use.
- Ensure the light switch timer is in the “Off” position i.e. the back plate / carriage where wheels are positioned should be rolled up (not touching the batteries)
- Place your index finger behind the wheel and “pop” it out of its position
Would you like further assistance?
- Use your preferred method of contact from the options below to speak directly with one of our advisers
- Please click here to submit a warranty claim